If you're anything like me, you have a lot of traditional fall and Halloween decorations. To decorate for fall I like to use things from nature like dried flowers, small Baby Boo pumpkins, leaves and acorns. And Halloween around my house is a combination of
scary and subdued.
But this year I wanted to switch things up a bit and try one of these painted pumpkins I've been seeing around the blogosphere for some time. I was actually inspired by a picture of a Chanel bag I saw in a magazine. It's called a Chanel Mosaic. You can find it in the 2015 Chanel Embroidered Mosaic Bag Collection.
I guess this goes to show you that inspiration really can come from just about anywhere. My original idea was to copy the pattern on the Chanel bag. Only problem was, my pumpkin was not a smooth pumpkin, by any means. The picture below doesn't do the bumps justice. I'm telling you it was extremely bumpy and rough textured. The stem is blue because I have it taped off.
This was going to make painting any kind of pattern on it tricky at best. So I sadly scrapped the Chanel pattern idea. But I did want to keep the same color scheme. So I thought that spray painting it with black chalkboard paint would be very cool. I was then going to write or draw on it with colored chalk pens.
Here it is before I wrote on it. Pretty cool looking, huh? Only problem was, just trying to write on it with chalk was a real pain due to the uneven surface of the pumpkin. I started off with an easy word in white chalk: "BOO." And it looked terrible. I didn't even take a picture of it, although now I wish I had just so you could see what I'm talking about.
After the chalk debacle I realized that I had to repaint a part of it to cover up the remaining faint chalk outline. But instead of spray painting it again, I just used a foam brush and chalkboard paint from a jar. Bad move. The paint from the jar was pretty glossy, and stood out like a sore thumb. So I ended up having to re-spray the whole thing anyway. Arrgh.
Then I decided to make it a two-toned pumpkin with polka dots. I mean, how hard could that be, right? So I split the pumpkin in half with painter's tape, similar to how I split my basket in half before I painted it. It's hard to get a straight line that goes completely around any spherical object but it can be done. For the pumpkin I used frog tape in about 2-3 inch increments. That's the only way I could be sure that the line I was creating was actually straight all the way around. One long piece just doesn't work.
Here it is, taped, before I added the bottom color.
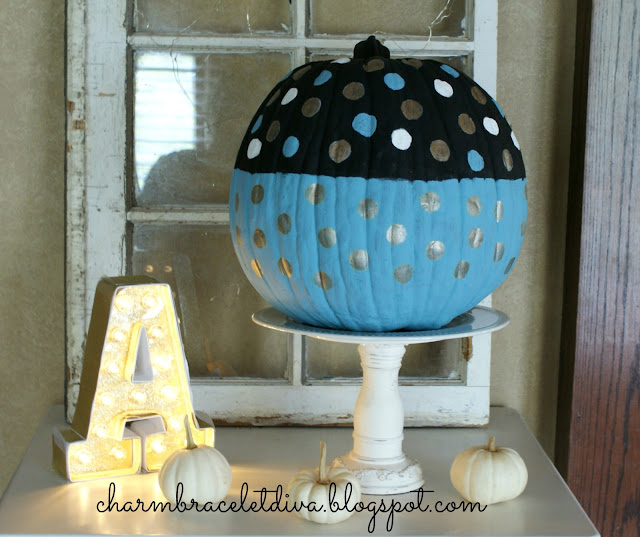
Here it is after I added the second color.
I placed a piece of tape on it to show you the approximate size of the pieces I placed end to end all the way around, before I added the blue paint to the bottom half (by hand). This is exactly the method I used to tape off a round mirror before I painted it. I've found that it works pretty well. For my polka dot stencils I used Avery repositionable round stickers. They were 3/4" in diameter.
This may or may not be the size you want to use. I will tell you that for a pumpkin my size, it took a TON of dots! I placed the dots where I wanted them, then I traced the outside of the stickers, some with a gold ink pen and some with a white ink pen, thinking that I wanted gold and white dots only. (Later I decided to paint some of the circles blue as well.)
I lifted the stickers off and painted inside the dots with acrylic craft paint. I used very tiny sized brushes so as not to get too sloppy and paint outside the lines. Seriously. I mean tiny. (I used the sponge for the blue bottom half of the pumpkin.)
If you're scratching your head about now I can totally understand. Why? Because there was such an easier way to do this! But I didn't know that I wanted polka dots until the whole pumpkin had already been painted. So I did it my way instead. I'll mention the EASIER way in my list of tips at the end of the post.
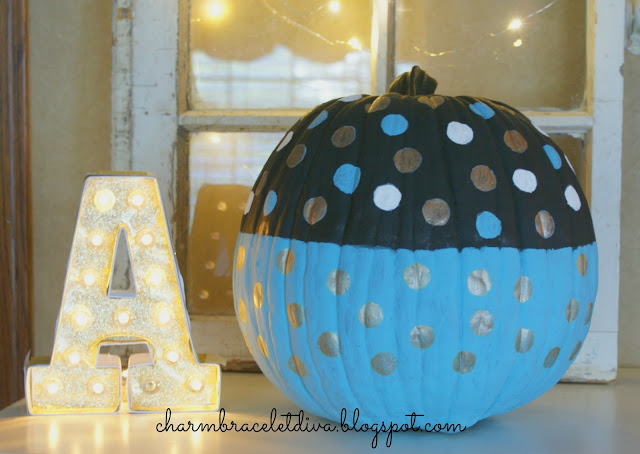
I was happy with the color combo, especially the way the colors popped on the black background.
Here it is with my Heidi Swapp marquee letter all lit up.
The things you see hanging from the window behind the
pumpkin are strings of tiny lights.
Here are a few shots with the tiny lights on.
How to Paint Faux Pumpkins: Tips and Tricks
-
Search for the SMOOTHEST
surfaced faux pumpkins you can find! Can’t stress that enough!
-
If you’re going to do
polka dots, do it the EASY way: Place repositionable circle stickers all over the pumpkin, THEN
spray paint the pumpkin. Once the paint is dry, pull off stickers and you’ll have orange (or
whatever color your pumpkin is) polka dots!
-
If you don’t want the stem
to be the same color as the pumpkin, be sure to tape it off with painter’s tape
before painting the pumpkin.
-
Don’t use two different
types of chalk paint (one a spray paint and the other, canned paint) if you can
help it because they very well might look different when they dry!
-
To assure a straight line when
taping the pumpkin in half, use small increments of tape as you go around the
circumference of the pumpkin.
I hope you enjoyed reading about my
my Painted Faux Pumpkin!
Thanks for spending time with me today!
Be sure to stay in touch:
Just click on my Facebook, Pinterest, Twitter or Instagram icons in my top right sidebar. You can also sign up there to receive my blog posts via email as well.
Don't forget to Pin it!


Leave a Comment!
What a cute idea! Your pumpkin is a wonderful! I love the Channel handbag; what a great inspiration piece! Thanks for all the great tips on painting a pumpkin- I really love this! Have a wonderful weekend!
This is so, so cute and I love how you used the stickers as a dot stencil ~ thanks for the inspiration! Blessings, Cecilia
I love polka-dots everything! Such a cute idea. I usually use a round sponge brush for dots but that smears. Good job!
Cute idea - thanks for the tutorial.
No plans for the weekend, but do hope to spend some time outdoors.
Enjoy your weekend.
You do have a elegant fashion sense my dear. I see it all the time on the things you pin! Love the color combination of the Chanel bag and how great it looks on the pumpkin. I find the easy way AFTER I do something the hard way nearly everytime I Try something new. You always inspire my friend. love, Penny
Kathleen this is so adorable and original. It's like a fashionista pumpkin. So very cool! Thanks for sharing your tutorial, and for keeping it real.
Post a Comment