Skiing is a quintessential winter past time loved by many around the world, myself included. Which is why I have a DIY Christmas Ski Lodge Wall Art project to share with you today. It evokes memories of a roaring ski lodge fire after a cold day on the slopes. Won't you join me?
When I was a teenager I used to ski in the winter months. I grew up near the Pocono mountains in Pennsylvania and took advantage of the many ski resorts in the area. It was fun to ski with friends and I have many happy memories of those days.
So it’s no surprise that I’m still drawn to anything rustic and ski- related in the winter. Once I started seeing early Christmas decor with a ski theme I couldn’t get the idea out of my head. And today I’m happy to say my project is finally complete and I’m in love.
Materials For DIY Holiday Ski Lodge
3-D Wall Art
1. thrifted frame with deep edges (or ledges) to use as shadowbox
2. faux greens, berries
3. red and black buffalo check ribbon (optional)
4. pair of mini wooden skis
5. paint, paint brush
6. paint pens or colored Sharpies
7. computer-generated words
8. pencil
9. painter's tape
10. mini winter sign (optional)
11. hot glue gun/glue sticks
12. sanding sponge (optional)
How To Make Holiday Ski Lodge 3-D Wall Art
When out thrifting, look for the right piece of wall art that you can work with, based upon your idea. I started this project with a $2.99 faux Italian wine crate wall art sign from Goodwill.
It was substantially heavy and I saw that it had a nice, deep back side that I cold use as my "shadow box," if you will. The inside "ledge" on the back was two inches deep all around.
1. Start by removing any hardware from the piece. I had to remove the brass "teeth" from the back before I got started (since the back would be becoming the front.) Then paint your piece in all one color, on whichever side you'll be using as your backdrop. Distress with sanding sponge as necessary. I used Rust-Oleum Chalked matte paint in White Linen.
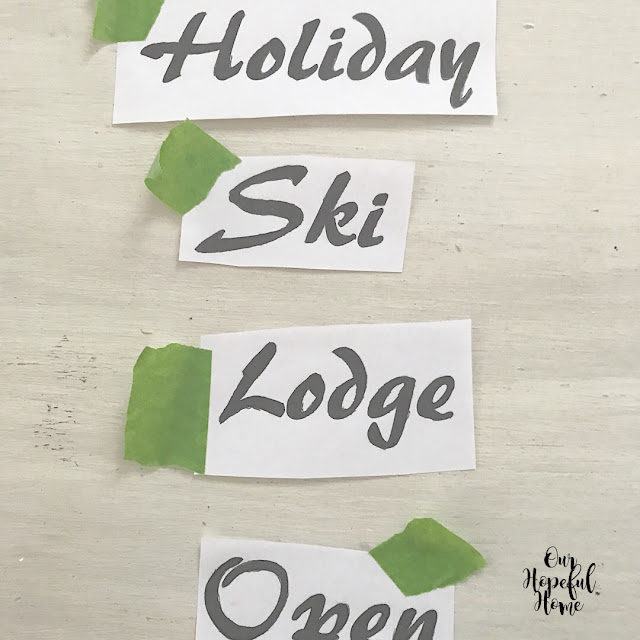
2. Determine what saying you want to use and what font would work best for your theme, then print it out in Word. I chose the font AR BERKLEY because I thought it gave the piece a retro vintage Christmas kind of vibe. Cut out each word and then place them all inside the box to check for appropriate size and placement. Re-size as necessary. (I basically eyeball it for size and then print out a test run.)
3. Take your first word and turn the paper around. Using a pencil, trace around the back side outline of each word, making sure to press the pencil down hard as you go. Assuming you use white paper and black ink you should be able to see through the paper from the back to the front which will help you trace.
4. Once all the words are traced on the back, place the first word in the frame and tape it down with a piece of painter's tape.
5. Now trace the front side outline of that word. Be sure to apply strong pressure so that the pencil tracing on the back side of the paper will leave a nice imprint.
6. Before removing the tape, lift the paper to see how dark of an imprint of you made. If some areas are too light, go back and apply more pressure. Once satisfied, remove the tape and the paper. Continue the same method of tracing until all the words are completely traced onto your backdrop.
7. Go back and paint in the letters with paint pens. I used red and green paint pens to continue with that retro Christmas feel.
8. Hot glue on any individual pieces you desire. I added a mini hot cocoa bar sign I picked up from Target's Dollar spot last Christmas.
9. Finally, hot glue your skis onto the frame. I got my mini skis at Goodwill over the summer for 99 cents. Ironically, they were brand new and came from Target's Dollar spot (Target sold them for $3.00!)
10. To "spruce" them up (get it?) I hot glued some left over faux greenery I had laying around as well as some faux red berries. I then tied it all up with red and black buffalo check ribbon from Hobby Lobby.
This Holiday Ski Lodge sign brings me back to high school and I'm loving every minute of it.
I honestly couldn't be happier with how it turned out. I think it's going to rank as one of my favorite Christmas DIY's.
Well, that's it until next time, friends!
I hope you enjoyed reading about my
DIY Christmas Ski Lodge Wall Art
and that I've inspired you in some way.
Don't Forget To Pin It!
Be sure to stay
in touch:


Leave a Comment!
Hi Kathleen! I wanted to stop in after I recognized your photo in the $430 Christmas giveaway. My blog used to be Cheap Chic Home. I stopped blogging, but then picked it up again in 2018 to give me something to do while we were preparing to sell our home. I'm now doing a fashion blog. I'm so glad you've had so many successes with your blog and are still going strong!
So cute! You create a lot the way I do; I collect a bunch of thrifted stuff and then figure out what I can do with it. Makes for a lot of clutter but the results are nice! I'm afraid I would keep my items inside the frame so the picture could still be "reversible." Scotch-Irish/Polish thrift!!
Post a Comment