As much as I love finding great vintage furniture pieces, I can't say that I love the musty smells that sometimes come along with them. So over the years I've hesitated to buy vintage furniture that had any smell or musty odor. But today I'm here to share 6 tips for getting rid of that old furniture smell, including which methods worked best for me.
This post contains affiliate links. A purchase of any one of these items helps to support this blog and its creative efforts at no cost to you. To read more, please see my disclosure page.
I'm writing this post as part of my participation in the Do It Over Designers bloggers' group. It's our first monthly get-together, and I'm very excited to start this every-two-month blog hop with them. So be sure to check out their projects at the end of this post!
Welcome to part two of my return-to-college series where I share my latest furniture transformation. Seven years ago I scored a vintage seed chest at Michigan's Longest Garage Sale. Four years later I looked into painting it and came up with My Worst DIY Nightmare. That should tell you something.
Here we are in 2020 and I STILL hadn't done anything with that darn vintage seed chest. But with our two daughters going back to college in the fall, I offered up the seed chest for my one daughter's flat screen TV stand. Hallelujah -- it finally got upcycled! As they say, necessity is the mother of invention.

As you can see in my Worst DIY Nightmare post, I had a pretty big project on my hands. It needed major cleaning, wood filler, and serious smell eradication. Yes, even after 7 years, it stilled smelled musty beyond belief. But now I was up for the task. Be sure to visit Say Hello To My Worst DIY Nightmare to see the initial, important prep work on this beast.
This time around we started with trying to get rid of the smell. I read that sunlight can help, so we put the seed chest and the drawers out in the sun for a full day. Unfortunately, still smelly.
And as you can see here, the inside of the drawers also needed help big time. YUK. First we vacuumed out the drawers, followed by wiping down the inside of them with a vinegar-soaked sponge. (We still need to lay some pretty drawer liners in each of the drawers. I'm letting my daughter pick out what she wants for that.)
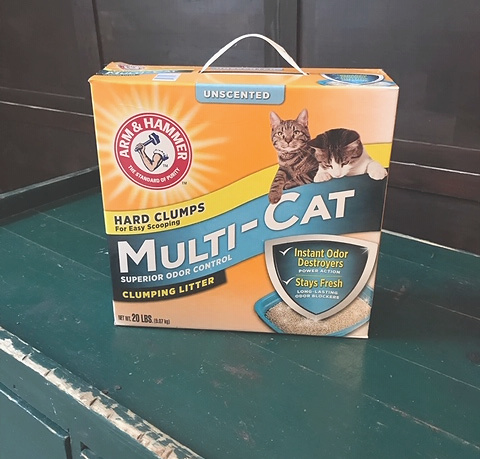
The next trick we tried for getting rid of the smell was using unscented cat litter. I bought Arm & Hammer Multi-Cat Superior Odor Control cat litter because I read that it worked well at getting rid of the smell and that it was low-dust. The 20 pound box cost $8.37 at Wal-Mart.
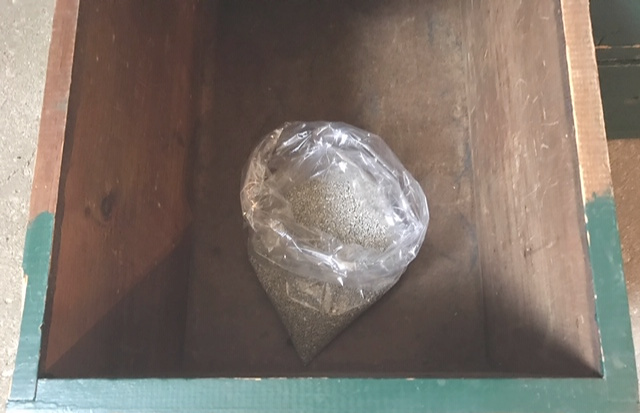
My daughter and I proceeded to fill plastic bags with cat litter and place them in each of the drawers. Then we waited. After only one day it was clear the pervasive musty smell had lessened substantially. So we waited a few more days and the results were pretty good. The smell was not totally gone, but you literally had to put your face into the drawer to smell it. (Prior to using the cat litter you could smell that seed cabinet from a mile away!)
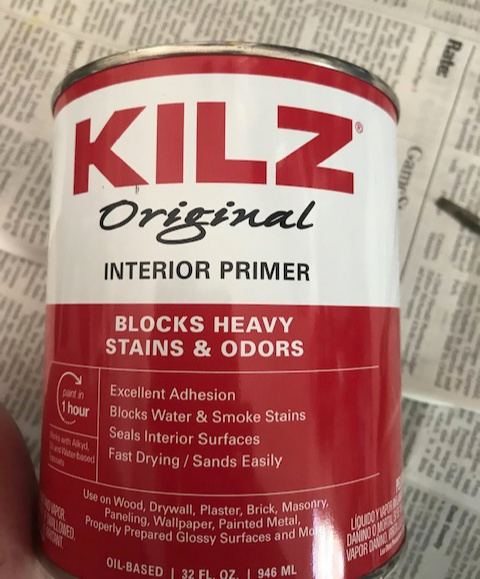
But we still had another tool in our tool box -- Kilz Original Interior Primer. This particular type of primer is exactly what you want when you need to both cover a dark paint color AND mask a nasty smell. It did both for me.
NOTE: Beware when buying primer for this double-whammy problem -- dark paint color AND musty smell. Most smell-blocking primers I found go on white but then dry clear. In other words, they won't help you in the traditional way a primer should -- it won't mask your underlying dark paint. Of course, if all you're worried about is the smell, you can certainly go with the smell-blocking primers that dry clear.
While it did the job for me, Kilz Original Interior Primer is a force to be reckoned with. I normally use water-based, low VOC chalk paints and forego even using wax. That makes it easy to clean brushes and sponges with just soap and water. And as a bonus, my usual technique doesn't do a number on our septic system which is particularly sensitive to chemicals.
But this stuff is pretty toxic. So be sure to wear gloves and a mask and goggles when using it. This is my daughter wearing her protective gear while applying the primer. I had such a hard time even cleaning the gloves and paint brush that I actually threw them out. Mineral spirits are supposed to get rid of it but that really didn't work for me.
I did learn, though, that you can buy the same Kilz Original Interior Primer as a spray paint. Maybe that would be less messy. At least you wouldn't have to clean paint brushes!
I was afraid that I would need to use two coats of primer, since the original paint was such a dark green color, but thankfully one coat of primer was enough. This monster of a cabinet used half of the 32 oz. can of primer.
Fast forward to after I applied two coats of Rust-Oleum Chalked matte paint in Linen White. I also used it for my daughter's thrifted pine dresser transformation and it worked great there as well. I wanted to clean up the hardware, but I gave it my best shot on one of the handles and realized that it was futile. So we just put the old hardware back on. For an opposite result, you can see how I cleaned up our kitchen cabinet hardware in How To Spray Paint Cabinet Hardware Like A Pro.
Not a whole heck of a lot of difference, so we just let them remain au natural. In all honesty, I would have loved to replace the handles with farmhouse bin cup pulls.
Apparently, someone else had the same idea. I found this vintage seed cabinet while doing a Google search (look familiar?) and it apparently sold for $500.00. Wow. I may just have to add those bin cup pulls after all. And maybe even some French country bun feet.
It killed me that I had to try and "style" this piece in my garage! I am so sorry for the background -- I'm not skilled enough at PicMonkey to erase it. So. Being real here. But trust me -- in the right room with the right accessories this will be fabulous!
I know I promised you 6 methods for getting rid of old furniture smell so here they are (we're assuming that you first wipe it all down with a sponge soaked in white vinegar, then allow to dry):
Six Ways To Get Rid Of Old Furniture Smell
1. Place the piece or pieces of furniture outside in direct sunlight for at least a full day.2. Place bags or bowls of cat litter inside it for at least a few days (and be sure to close any drawers -- which also holds true for methods 4 through 6 below).
3. Use an odor-blocking primer.
4. Put a bowl or bowls of white vinegar in it for at least a few days.
5. Place boxes or bowls of baking powder inside it or in the drawers.
6. Place bowls of coffee grounds inside it or in the drawers.
These methods apply to not only dressers, chests and desks with drawers -- but to vintage suitcases, steamer trunks, cabinets, etc. as well.
Sometimes one method won't be enough. I used methods 1 through 3, and I'd say that together they managed to rid the seed chest of about 95% of its odor. So don't be discouraged if one method alone doesn't do it for you. I can't personally vouch for methods 4 through 6, but if you do a little research you'll find that many experts swear by them.
So don't be afraid to bring home a thrifted piece of vintage furniture. You have a number of avenues available to you and most likely you'll find the one (or ones) that work for you. So what are you waiting for?
Well, that's it until next time, friends!
I hope you enjoyed reading
6 Tips For Getting Rid Of Old Furniture Smell
and that I've inspired you in some way.
Now be sure to check out my friends' projects:
Apple Street Cottage
Chas' Crazy Creations
Little Vintage Cottage
Pandora's Box
Cloches And Lavender
Exquisitely Unremarkable
Apple Street Cottage
Chas' Crazy Creations
Little Vintage Cottage
Pandora's Box
Cloches And Lavender
Exquisitely Unremarkable
Be sure to stay in touch:

Click HERE to subscribe.
Don’t miss another thrifty, DIY
home décor post!


Leave a Comment!
Great tips! I've actually turned away from a few pieces because of the smell. I'll use your tips instead! Pretty makeover,too!
I love Kilz, it's great for so many things. Your dresser turned out amazing.
Love repurposing and upcycling! Thanks for sharing and wonderful creating with you.
Fantastic tips, Kathleeen. I'm glad you showed how you used the cat litter because I always thought you had to pour it in the drawers! BTW, I've used that same primer. It stinks, but is sure does the job!
What great suggestions - so often I will pass up a wooden piece because of the odor! Thanks for sharing!
Kathleen you won the battle with this chest. The original primer is tough, the odor not good at all. I could see this with Frenchie bun feet, how cute would that be? You know I love my French.
Great project!
Cindy
Wow, what a great project, I'm so glad you didn't give up on that cabinet, it turned out great! I will have to remember cat litter next time I have a musty piece!
Tania
Great tips and final end product. I had a musty commode once; I put charcoal briquettes in it; didn't do a thing. Then I threw a bag of cedar chips it and that helped considereably. I have also sprinkled baking soda in, the vaccumed it out. Personally, I would have sprinkled a scented cat litter in and stirred it around for a couple of days! I bet that cat litter that is pine scented sawdust pellets would do well, too!
Post a Comment