Contact paper has many uses when it comes to DIY home decor projects. Today I'm going to share how I used my favorite repositionable contact paper to line the drawers of my thrift store French provincial dresser. It's an easy way to update and refresh any and all drawers you might have in your home.
This post contains affiliate links. A purchase of any one of these items helps to support this blog and its creative efforts at no cost to you. To read more, please see my disclosure page.
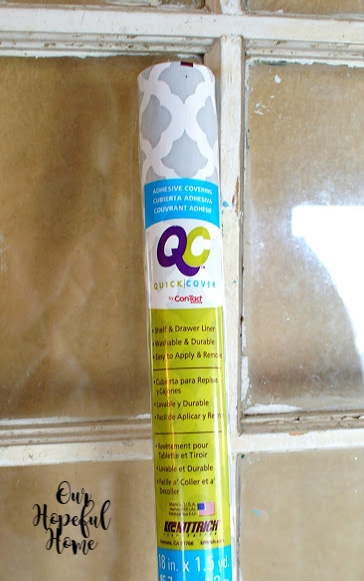
Here's my favorite contact paper of all time. I love the gray and white quatrefoil pattern. I buy it at Dollar Tree, and it must be a popular item because I've been buying and using it since 2016!
Each roll is 18" by 1.5 yds. For this project I was able to cover four 12" x 17" drawers with one roll. I used a second roll to cover two 12" x 17" drawers and three 12" x 9" drawers. Two rolls, nine drawers. So it only cost me two dollars for this part of the project. If you like this paper but can't find it at your local Dollar Tree (I recently had trouble finding more) you can take a look at this Con-Tact Self-Adhesive Drawer Liner.
Then I take the roll and lay it across the entire bottom side of the drawer. My goal is to cut the contact paper into a square. You can't see it here but the actual roll is hanging over the top part of the drawer. I then use my scissors to cut along the right side of the drawer. I probably should have marked it with a ruler first, but I was too impatient for that. So I winged it. When I reached the top right corner of the drawer I stopped cutting.
(NOTE: This roll just happened to closely match the dimensions of the drawer. This way I could just lay the roll on top of the drawer and I only had to cut down two sides. Not all rolls of contact paper will so closely mirror the size of your drawers. You might even need more than one piece of contact paper per drawer to completely cover the inside. It just depends on the size of your drawers and the size of your roll of paper.)
At this point I push the contact paper down into the top right corner of the drawer and use a pencil to mark where to cut across to complete the top of the square. Then I used a ruler to draw a straight line all the way across from that point.
Finally, I cut along the line I just drew, leaving me with the square of contact paper I need.
Before pulling off the protective backing, place the paper into the drawer to make sure it will fit. Once you're convinced the fit is adequate, then you can pull off the backing and adhere your contact paper to the inside of the drawer. The beauty of repositionable contact paper is that you can keep adjusting it until its placement is to your liking.
Unfortunately, sometimes the paper might not fit as perfectly as you would like. You can see in the above photo that one of my paper squares fell short in size, leaving a sliver of the drawer uncovered. It was only a nominal amount so it didn't bother me.
However, sometimes the mess you (I) create(d) might need a bit of a fix. As you can see, my jagged scissor work above leaves something to be desired. (It's why you should use a ruler, which I did not use here.) In this case I wanted to fix it.
The beauty of using contact paper that has a recurring pattern on it like this one (and wallpaper as well) is that if you make a mistake or need to overlap for some reason, you can cut another piece, line up the pattern, and keep on going. So I added a piece to cover my jagged edge. Not perfect, but much better.
Here's an aerial view of that finished drawer. The dresser has 8 more drawers and I can't wait to show you each of them in all their glory. But that will have to wait until my French provincial dresser transformation post. So stay tuned!
Well, that's it until next time, friends!
I hope you enjoyed reading
How To Use Contact Paper For Drawer Liners
and that I've inspired you in some way.
Don't Forget To Pin It!


Leave a Comment!
Your drawer liners look great!
Love the quatrefoil pattern--treated myself to a Kohl's bed-in-a-bag this spring with aqua on one side, gray like your contact on the other! I love how you used the bottom of the drawer to come up with your template-so much easier! I love creasing corners rather than messing around with rulers! I have also made newspaper templates. It took me a while to realize I could just reverse a template when wallpapering the other side of a dollhouse room wall!
Post a Comment