My love of chinoiserie began earlier this year. Maybe it was the extra time spent on Instagram due to quarantine. Maybe it was my friend Carol from BlueSky At Home's DIY chinoiserie lamp that totally inspired me. Maybe it was the chinoiserie estate sale and antique store finds I picked up this summer. Either way, I'm in love. And that is that. So it should be no surprise that I tackled a chinoiserie project for myself - DIY chinoiserie pumpkins for fall decor! Stick around and I'll share the secrets I learned from making my own decoupage chinoiserie pumpkins!
This post contains affiliate links. A purchase of any one of these
items helps to support this blog and its creative efforts at no cost
to you. To read more, please see my disclosure page.
I started off with five orange, ceramic pumpkins I got for $1 each a few
years ago at Target.
While I wasn't thrilled with the bright orange color, I did love the
adorable gold stems. So the first step was to paint them white and create
a neutral base to work with. (You can also find fairly inexpensive
faux pumpkins that are already white
and skip this step.)
You can see that the gold paint rubbed off on a few of the stems. Unfortunately, it happened when I covered the stems with painter's tape to protect them from the white paint. When I tried to readjust the tape I saw that it was actually pulling off the gold paint. So in the end I did NOT use painter's tape.
I did, however, use a gold paint pen I had on hand to fill in the orange
spots and the stems looked good as new! You will see that in the "after"
shots below.
And here they are, painted with a base coat of white paint, ready to be transformed!
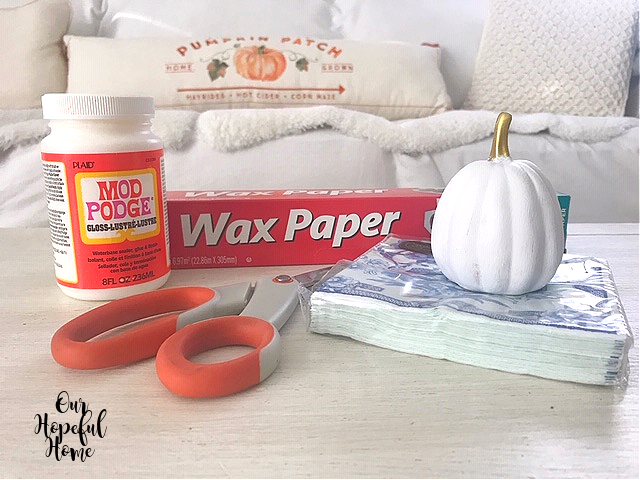
The most important supply for this DIY project (beside the pumpkins, of course) is most definitely the cocktail napkins. Yes, cocktail napkins. That's what you'll be using to create that chinoiserie look for your pumpkins.
I ordered some
chinoiserie paper cocktail napkins
from Amazon. They were recommended by my friend Carol from
Bluesky at Home. She used them on her
DIY chinoiserie lamp and
the results were out of this world. Enough said. But seriously, you can
use whatever napkins you want. It just depends on the look you're going
for.
You'll also need some Mod Podge. I used
Mod Podge Gloss, but I think
Mod Podge Matte
would work just as well, depending on your preference.
I used a flat-edged paint brush I already had on hand, similar to this
Mod Podge paint brush. And the paint I used was left over from an old home improvement project
-- Benjamin Moore's Decorator's White. You can use whatever white paint
you have on hand.
You'll also need scissors to cut the napkins, and wax paper to set your wet pumpkins on to dry. So are you ready? Let's go!
How To Make Chinoiserie Pumpkins
1. If necessary, paint your pumpkins white in order to create a neutral base to work on.
2. Your paper napkin will most likely have three layers to it -- you only
need two. Here you can see the first of the bottom two layers pulled back.
And here you can see both the first and second bottom layers pulled back. Many tutorials I've read say you should remove both underlying white layers before beginning. I take issue with that advice. If you actually pull back both white layers, you are left with one seriously thin layer to work with.
No one seems to mention that you have to have an incredibly light hand while doing this or risk ripping the whole thing apart. It is merely tissue paper, after all. So my sincere advice: only remove one white layer -- the outermost layer.
3. Once the outer white layer has been removed, cut your napkin into strips
-- whatever length works for your pumpkins. It will depend on the shape and
size of the pumpkins you're working with. I had small pumpkins, so I cut
small strips. (You can also cut the napkin into other shapes -- whatever
works for your underlying base object and pattern on your napkin, whether it
be for a pumpkin project or any other project.)
4. I placed my strips on a paper plate, one at a time, and brushed them with Mod Podge on their underside. Then I brushed Mod Podge onto the pumpkin itself before placing and securing the strip to the pumpkin, working my way all the way around the pumpkin.
Before starting with another strip, I made sure to paint some Mod Podge along the new paper "seams" I had just created as a way to add a bit more security to the strip's placement.
DIY Decoupage Chinoiserie Pumpkin Tips
- I didn't worry about decoupaging the entire bottom of the pumpkins because I knew the bottoms were never going to see the light of day. Since the bottoms were totally flat, I knew I wouldn't be displaying them in any other position than upright. However, if your pumpkins are the type you might place in a pile in a basket or similar container, I think you should be sure to fully cover the bottom of your pumpkins with napkin strips.
- You are basically working with wet tissue paper! If you manhandle it too much It. Will. Rip. But never fear -- you can always just grab another piece of napkin and start again. There's basically no wrong way to do this. If something rips, just take a deep breath and make it a do-over!
-
In the past I've used foam brushes for my decoupage projects, but I
really loved using the flat-edged paintbrush for this project. The paint
brush was much easier to control and I think it applies the Mod Podge
more consistently. I also think it was easier on the napkin, helping me
to avoid ripping it.
-
Some people go over the whole thing with Mod Podge after the fact. I
didn't feel that was necessary here. It's up to you. There's actually a
spray for that:
Mod Podge Ultra Gloss Spray On Glue And Sealer.
I was unable to find a spray like this in any other finish than
gloss.
Once they were finished I couldn't wait to get to decorating!
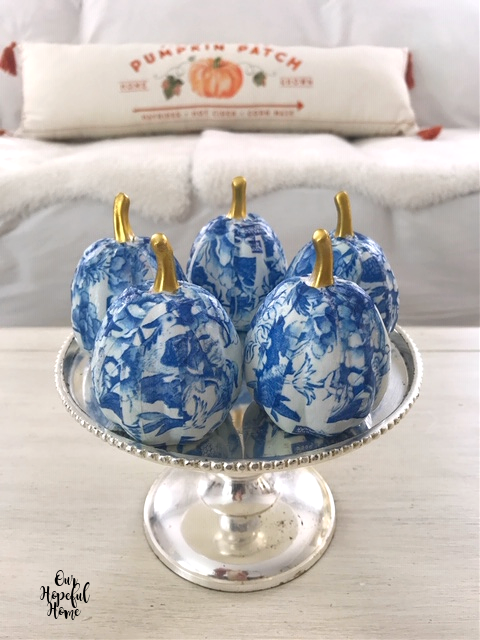
I think when they're placed all together like this they create a strong
visual effect. The gold stems and silver cake stand add a glam vibe to
this vignette.
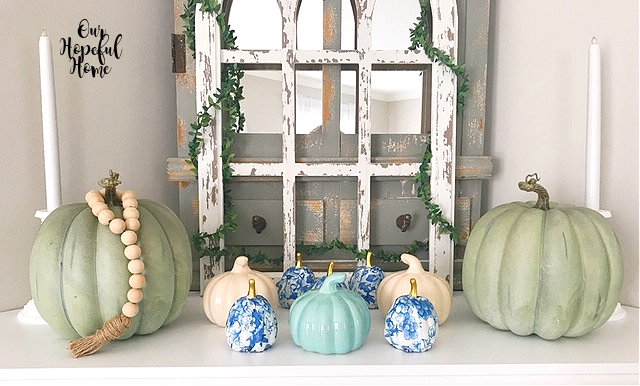
But I also like how they look when mixed in with other types of pumpkins.
(Believe it or not, the three ceramic pumpkins are from Dollar Tree. I
found a similar
blue ceramic pumpkin
and
white ceramic pumpkin on Amazon.) Mixing textures like this also creates great visual
effect.
More glam.
I finally decided to leave them here, on the living room mantel, flanked
by -- you guessed it --- more pumpkins! The two large blue faux pumpkins
were from Wal-Mart last year. I found a similar white
faux pumpkin
on Amazon.
The wood bead garland lends a real farmhouse feel to the mantel
vignette.
Overall I was thrilled with how my DIY chinoiserie pumpkins turned out. So much so that I know I'll be using them as fall decor for years to come. I even have two other DIY chinoiserie decoupage projects planned, so stay tuned for those!
Be sure to stay in touch:

Click HERE to subscribe.


Leave a Comment!
Awesome idea !
Thank you for sharing the tutorial. They look amazing too !
Enjoy your weekend.
Fabby
These are so pretty. Thanks for the idea and directions. Have a great day. xoxo Kris
Pinning these right now, Kathleen, they're amazing. My Mom collects a lot of blue and white pieces too so I'm going to forward this post to her. She's gonna be bananas! Hugs, CoCo
I'm inspired to give this a try and have pinned to one of my Pinterest boards. So happy to have discovered your blog...thank you for the inspiration.
Post a Comment