Link Up Your Favorite 2010 Project Party!

December 29, 2010

I've noticed that a number of bloggers are posting their favorite blog posts and/or projects for 2010.  So I figured what the heck?  What have I got to lose?  I'd LOVE to see yours ~ whether it's a piece of jewelry, altered art, a room makeover or an awesome craft. I made my list.  It made me take stock of this past year's progress {or lack thereof}.  Here are my favorites.


I can see that I want to continue with vintage, eclectic, boho shabby chic charm bracelets (surprise!) in addition to expanding my line of Irish Dance charm bracelets.  And, as always, I want to continually improve upon my sweet vintage charm necklaces. 

Junk Gypsy,
Purveyor of All Things Gypsy,
Vintage Junkaholic, 
Vintage C-H-A-R-M.  Yup, that's me.

Happy New Year to all of you,
my sweet readers and followers. 
Here's to an awesome, vintage, junky 2011.

Now link up those favorite projects of 2010.  NO rules.  Link up as many as you want!  I can't wait to see the incredible talent out there!  GO!

UPDATE: My Linky Code for this party was deactivated when the service went from being free to being a paid-for service.  I tried to get the code back but had no luck with the service provider.  Sorry!   

White Christmas

December 22, 2010

So I'm a glutton for punishment.  Last week I shared pictures of luxurious items from the store-that-shall-remain-nameless-lest-I-covet-their-textile-goods-you-know-who-I-mean-starts-with-a-POTTERY-and-ends-with-a-BARN.  This week I'm no less in love with these White Wednesday photos.

ALL PHOTOS COURTESY OF SARAH KAYE.


Okay, so some of it's a bit silverish, but we'll let that slide.  I want to go over to THIS house for Christmas.  How about you?

I'll be linking up at

Faded Charm

It's Not Too Late ~ Snow Globe Soap Tutorial

December 21, 2010


Okay, so I was trying to figure out what to do with my kids while they're home for the entire week before Christmas (and after, but that’s another story…) when I came across Alphamom’s post on snow-globe soap. I was sold on the absolute cuteness factor as well as its' relative ease on the kids’ crafting scale, so I decided to go for it.

Here’s what you’ll need:

Bar of white hand soap (3 for $1 at The Dollar Store)

Ice cube tray(s) (2 for $1 at the Dollar Store)

Small plastic toys that’ll fit into ice cube trays ~ I picked up little Santas and snowmen for 60% off at Michael's.


1 glycerin brick ($10 at Michaels’, I got it for $5 with my 50% off coupon)


1 bottle blue soap dye
1 bottle soap fragrance (I chose cinnamon ~ yum!)
Glitter


Vegetable peeler
Pyrex measuring cup or any glass bowl
Toothpicks

PRE-MELTING FUN
Here’s where the kids come in. Give them each a bar of white soap and a vegetable peeler. Have them “peel” the soap into curly-ques for later use as a snow floor.

I have to give equal time here to all three chickadees who were instrumental in the making of these snow globes!


In the meantime....

Step 1
Cut the glycerin into chunks, along the lines already provided in the brick itself. Our best guess scientific method proved that 4 blocks created enough melted wax to fill 5 ice cube tray slots. Place in Pyrex measuring cup or any glass bowl.

Step 2
Microwave on high for 1 minute. If it’s not totally melted, stir with a metal spoon and reheat for a few seconds until all is melted.

Step 3
Add 2 drops (AND I MEAN ONLY 2 DROPS) of coloring, and at LEAST 2 drops of scent to the mix. The more the scent-ier, if you know what I mean! I wanted a real strong scent so I just p-o-u-r-e-d it in!  If you put in any more dye the globe will turn out REALLY blue.  Like so.

Yes, I know Santa looks like the Abominable Snowman here.  Needless to say we're keeping this one for us.


Step 4
Pour the mixture into each slot of the ice cube tray, leaving about a quarter inch open at the top. Sprinkle the glitter into each slot, and swirl with a toothpick to mix it around in the slot.


Step 5
WAIT 5 MINUTES. You should see the mixture starting to “gel” and getting thicker.

Step 6
Carefully place your plastic decoration into each slot, and make sure to place them UPSIDE DOWN (because the bottom of your cube will become the top later).


Step 7
Now sprinkle some grated soap “snow” as the next layer of the cube, but only a little, because if you use too much snow the cube will not stay together at pop-out time. I used it VERY SPARINGLY. Then use more melted glycerin to top off the cube.


Now place in the freezer for AT LEAST A HALF HOUR to solidify. Take the tray out of the freezer and pop the cubes out as you would real ice cubes. And VOILA! Pretty petite snow globe soaps!


These are great hostess gifts as well as great little surprises to send to family near and far. That’s what we’ll be doing. Ssshhh….


To wrap, place in clear plastic bags and tie with glitter pipe cleaners. I got the label template from eighteen25.  And off they go!

I hope you crafty people have fun with these ~ it's all in the giving, right?

~ Happy Holidays ~

I'm linking up here:

BELLA BEFORE AND AFTER


FUNKY POLKADOT GIRAFFE


HOPE STUDIOS


My Vintage Angel

December 16, 2010


Well, it's really OUR angel.  It was given to us by my mother and father-in-law fifteen years ago for our first married Christmas together.  It would be special for that reason alone, but this vintage angel has an incredible story to tell..... 


My in-laws were married in 1952.  Right after the wedding they were whisked off to Germany where my father-in-law served in the military in Nuremberg.  This angel harkens from their first married Christmas together in Germany the following year in 1953.


Isn't she stunning?  Nuremberg is called the Christmas City, and hosts the famous Christkindlesmarkt, where they bought this angel.  In German it translates into Christ-Child Market and has taken place yearly since at least 1628.  Some of the glass ornaments in my prior post were also purchased from that market and packaged lovingly along with the angel and brought all the way home to the U.S. 

She's 57 years old and still kicking.  I'd like to think that someday one of our kids will hold a place for her in their hearts just as we hold a place for her today in ours.

    
This picture doesn't do her justice as my photo-taking prowess still leaves much to be desired.  It's just nice to know that she's there. Christmas is RIGHT around the corner.  Hope you're able to enjoy the season and think about the angels in YOUR life.  I know I've had many.  Lucky, lucky me.

Well, that's it until next time, friends! 
I hope you enjoyed reading about 
My Vintage Angel

Be sure to stay in touch:
Just click on my Facebook, Pinterest, Twitter or Instagram icons in my top right sidebar. You can also sign up there to receive my blog posts via email as well.

If you sign up via email, you should receive a confirmation email in your inbox. If not, please check your spam folder(and/or your "Promotions" folder if you have gmail)!

Thank you!
Don't forget to Pin it! 


Don’t miss another thrifty, 

DIY home decor post!
      

White Wednesday (and I Don't Mean Snow)

December 14, 2010

Although we HAVE had our first snow, what with being in the Midwest and all.......

As for White Wednesday, I've been eyeing these beauties for a while and thought I'd share them with you.

All photos courtesy of, you guessed it, Pottery Barn.  Not a lot of mystery with me, I confess.

 Can't you just feel the softness and the warmth of these?  I've been noticing these "faux" fur throws gaining popularity lately.  Makes me want to curl up by the fire with a good book.  

I think these pillows would be just smashing with the throws. Talk about indulgence.

I've always been a sucker for monograms.


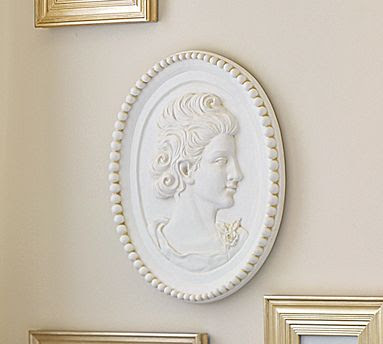
I brought home two of these babies from the thrift shop, although they were painted different colors and not just white.  My family thought I was a little bit nuts and said that they were "scary" looking!  Little did they know that I had it in mind to paint them white......if they end up looking like this I think they'll look quite nice.

In my other life I used to be a frame-a-holic.  My tastes have evolved over time, so some of my old frames don't exactly go with our current decor. THIS frame, however, would be quite welcome in our home today!

And as for that snow, we're ready for it.  You have to be if you live out here in this perpetual Winter Wonderland ~  where we have snow on the ground from November through March (and sometimes April!).  Now if I just had one of those scrumptious white fur throws to get me through the winter......maybe it's not too late to add to my Christmas list?  Wherever you are, stay warm.  Enjoy the snow if you have it.  And have a great week.

Pottery Barn-inspired Christmas Candles Plus Bling

December 13, 2010


Source


Source
Aren't they gorgeous?  Swoon-worthy in my book.  I feel cheap using the word "knock-off" so I always use "xyz-inspired" instead.  And I must give credit not only to Pottery Barn but to my fellow blogger friend Carol over at The Answer is Chocolate.  I had seen these in blog-land and really wanted to make my own, but it wasn't until I saw her post about making one that I actually DID something about it!  So thanks, Carol.  You can check out her tutorial here.

My first attempts called for simple dollar store candles, one "with saint" {Jude, by the way} and one "without."  It didn't matter either way because my Christmas music "wrapping" paper as I like to call it beautifully covered up anything that was on the outside of the original candle.


This one I embellished with a flower, diamond bling already attached.  I then added a plastic gold decorative chain and an angel.  


The flowers are actually dollar store hair pins, which I took apart and used for this project.  I loved the finished candle so much that I actually dragged my daughters back to the dollar store with me to buy them out!


I'm thinkin' it was worth it!

But of course I didn't stop there.

I embellished this one with a repurposed pearl earring on the top, a gossamer fabric bow in the middle and a sterling silver cross for good measure.


I'm pretty happy with them ~ I think I feel some Christmas gift mojo coming on!

The vintage Christmas music images are compliments of  Vintage Feedsacks.  I saved the images onto my computer, copied them in color and trimmed them down to fit the candle.  (Having a scrapbooking paper cutter comes in handy sometimes...)  I used double-sided tape to attach the paper to the glass and the glue gun to attach the embellishments.  Pretty simple and not too shabby!

I hope you like my Pottery Barn knock-offs inspired Christmas candles!  Now if I could just get some elves to wrap all my gifts......

Have a great week!
I'll be linking up here:


Related Posts with Thumbnails