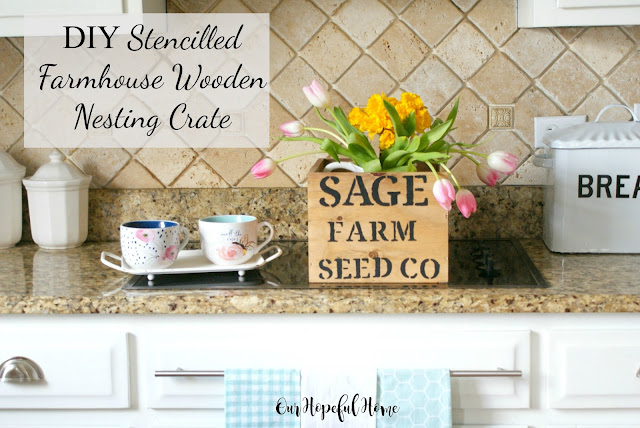
I've been eyeing some nesting wood crates online for quite some time, having seen them offered by at least a few different online retailers. But thrifty girl that I am, I just could not justify the price despite how much I liked the way they looked and how much I knew they would fit right in with my farmhouse aesthetic. Then fate stepped in and helped me out.
This post contains affiliate links. A purchase of any of these items helps to support this blog and its creative efforts at no cost to you. To read more, please see my disclosure page.
For my birthday in February my husband bought me a bunch of outdoor wooden planting boxes on clearance at a local big box store. Some of the boxes were pretty big. But the smaller ones reminded me of the nesting crates I had been eyeing online. (Bonus -- they have chalkboard paint already painted on one side that I can use to write cute sayings on in the future.)
Here is the nesting crate inspiration. I just knew when I received the wooden planter boxes as a gift that I could do something similar to the nesting crates. Farmhouse simple: raw wood crates with attractive graphics. Right up my DIY alley!
Since most of my stencils were too big for the size of my boxes, I exercised a little editorial discretion and changed the words to suit my purpose and the space available. I still think it looks great.
DIY Nesting Box Stencilling Materials
black acrylic craft paint
painter's tape
wooden planter box
paint brushes
stencils (not shown)
Most tutorials tell you to use stencil brushes for projects like this one. I own a set of them, but never use them! I find that these two run-of-the-mill brushes work the best for me. One has angled bristles and the other has flat bristles that go straight across. The flat one comes in handy afterwards if I need to make any touch-ups.
The process I used was exactly the same as so many of my other stencilling projects. I just picked out the style of stencil I liked, taped the letters down and got to work using black acrylic craft paint.
Be sure to paint from the outside in. In other words, try not to brush the paint outward toward the outside of the stencil. Less is more. You can always add more paint.
Just know that it may look like a hot mess while you're painting it, but if you make sure not to get any paint under the stencil it should turn out fine.
See what I mean?
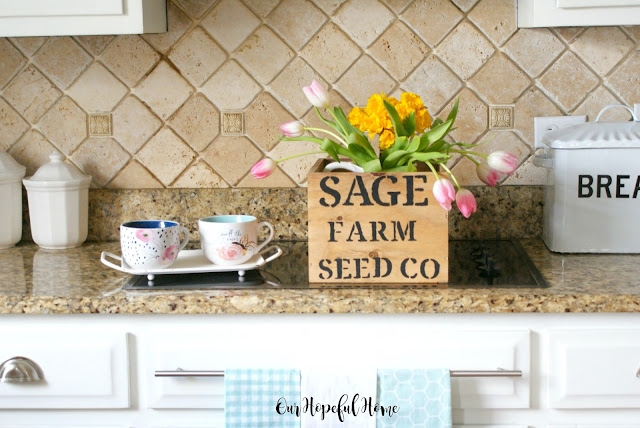
I threw some grocery store flowers into one of my farmhouse ironstone pitchers and plopped the whole thing into the crate. I just love neutrals with a pop of color.
My metal farmhouse metal bread box adds to the cozy, farmhouse kitchen feel.
Aren't these tea towels adorable? I got them at Target's Bullseye Playground, otherwise known as their Dollar Spot. I'm clearly being real here since you can tell that I was too lazy to iron the towels for this photo shoot! The towel bar was not originally there. A while back I shared How to Install Farmhouse Kitchen Towel Bars to show you how we did it ourselves.
These two mugs are my latest crush. They were also a birthday present. I've fallen in love with the pretty pink flowers and gold embellishment. They're sitting on what's one tray of a three-tray set I got from Decor Steals some time ago.
Here's one more Target tea towel. I just love the graphics.
While the boxes online appear to have the words heat-stamped into the wood, I thought my stenciling using paint looked pretty darn similar. I did not, however, add metal hooks onto the boxes since I knew I would never use them hanging on a wall. (Spoken by me, a true member of the "I'm afraid to put nails in the walls" club.)
It's been almost a year and a half and I'm still loving the look of my white painted kitchen cabinets. I previously shared how I managed the transformation in my post DIY White Modern Farmhouse Painted Kitchen Cabinets. You can check that out for all the details.
For some other DIY stenciling ideas, you can
check these posts out as well:
Well, that's it until next time, friends!
I hope you enjoyed reading about
Farmhouse Friday: DIY Sage Farm Seed Co.
Nesting Wood Crates.
Don't Forget To Pin It!


.png)


Leave a Comment!
Loved how you photographed the project, explaining each step. Also love how you included other posts with similar projects and them more at the bottom. I also enjoy how you keep it thrifty as so many of these "special interest" items in stores are so overpriced. Great job!
Hi Kathleen !
I love your wooden crate. Everything looks wonderful, every spot of your home and kitchen.
Thanks for sharing.
Fabby
So pretty with those tulips!
Post a Comment