I've been in love with vintage advertising crocks for years. Unfortunately, the only ones I've come across were in antique and vintage stores selling for top dollar. That's why I was thrilled to find out there's a way to create the look yourself for less! Stick around and I'll show you where I got my crocks, both vintage and new, and how I recreated those vintage European advertising crocks without breaking the bank!
This post contains affiliate links. A purchase of any one of these items helps to support this blog and its creative efforts at no cost to you. To read more, please see my disclosure page.
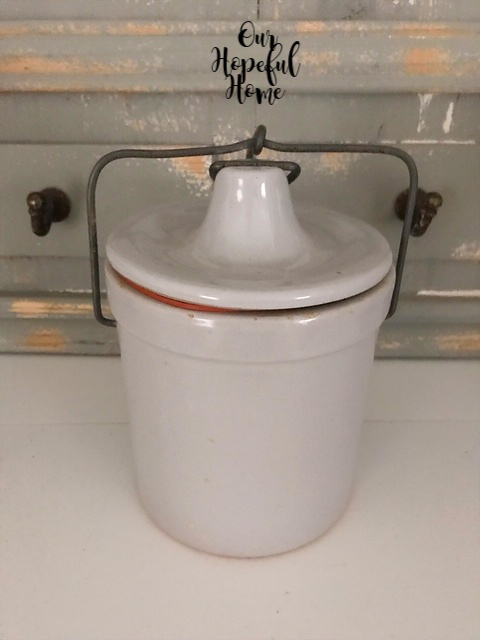
Crock Number 1: I picked this up at a local store called Red Hive Market in Batavia, IL. They're self-described as a place that sells unique vintage, shabby chic, industrial, painted, recycled and up-cycled treasures for the home. Hello, my kind of store! You can find them on Facebook here.
The crock had a wire bail on the lid and was plain on the outside, which made it easier to turn it into something pretty!
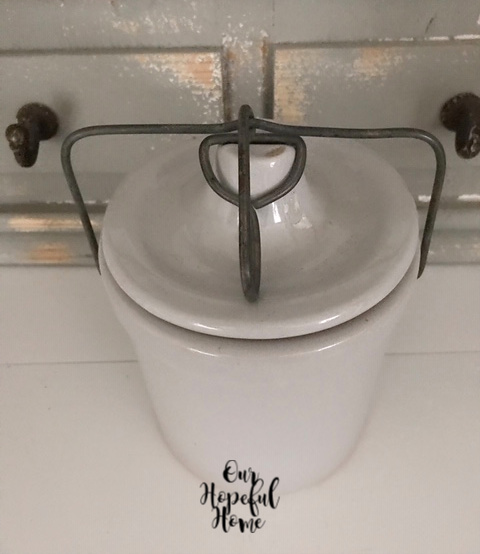
Many old cheese crocks still have their rubber seals attached to the lid.
It was more than I would have paid at Goodwill, but way cheaper than any crock I could have found with advertising on it, for sure.
Crock No.2: I picked up this vintage cheese crock at a resale shop in Galena, IL called EZSale USA Consignment. I'll be sharing all about the Wisconsin company that made Kaukauna Klub cheese in an upcoming Thrill of the Hunt so stayed tuned.
It also has a wire bail closure on the lid.
While I liked the original advertising on it, I still preferred a more European, vintage vibe. This plain side of the crock made that possible.
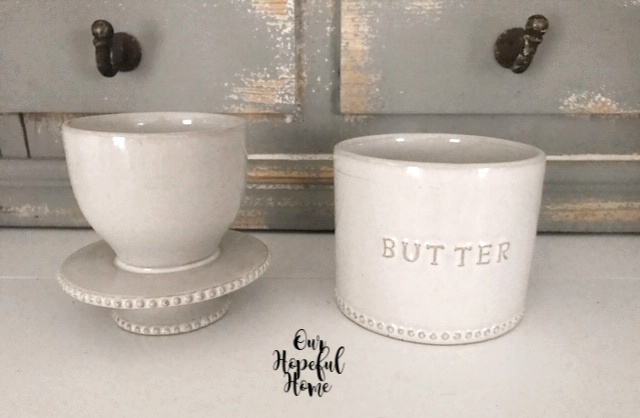
Crock No. 3: It's not a crock at all. It's a butter bell!
Here it is with the lid taken off. Butter bells are interesting things in and of themselves, and I'll be doing an upcoming post about the ins and outs of where they came from and how to use them.
Believe it or not I picked this up on clearance at Target last year. It's from the Hearth & Hand collection from Chip and Joanna Gaines. Once again, all I had to do was turn the jar around and there was a blank slate on the other side.
Here's what I used to create the look. It's a clear decor stamp set made just for crockery from Iron Orchid Designs.
The back of the package shows examples of what some of the stamps look like when used on painted jars as well as pots and crocks.
Bridget, owner of Red Hive Market, insisted on taking a few pictures of me and the products I purchased from her establishment. (The gray cheese crock is in the bag.)
Here are some stamps up close and personal.
Lemon curd jars, as well as Dijon jars, have always been my favorite.
Here's the ink pad I used to create the vintage-looking advertising crocks. It was an extra large size pad from Ranger Archival Ink. Be sure and get the right sized pad for the size of the stamp(s) you want to use! While I did not take step-by step pictures, I can tell you that I had a heck of a time getting my crocks looking the way I wanted them to. Some tips?
Tips For Using Iron Orchid Designs Decor Stamps For Crockery
1. Don't over-ink your stamps. I found that less is more with this project. First I used the stamp on a piece of paper to get some of the ink off, then I immediately moved the stamp over to the crock and applied it there.2. The package says to lightly sand your stamps before using them. I did, but I'm not sure how much of an effect it had on the actual process as a whole. I think it's supposed to help your stamp hold the ink better. Ironically, I wanted it to hold less ink.
3. Keep some hairspray and Q-tips nearby. If at first you don't succeed.....(which I didn't) try, try again (which I did). My first few attempts were just an awful inky blur. But after spraying the crocks generously with the hairspray, I was able to wipe off the ink with dry paper towels. NOTE: I used the hair spray trick immediately after stamping. I'm not sure how well it will work if you let the ink set first before trying to erase it. My friend Linda from Itsy Bits and Pieces recommends using a Magic Eraser to get the less-than perfect messy ink off. I also used Q-tips to remove some smudges on the stamp itself before transferring it onto the crocks.
4. Secure your crock first on a non-slip surface. I placed mine in a nest of dish towels that I knew would keep them from rolling around while I tried stamping them.
5. I found that the larger the stamp, the harder it was to keep it all from smudging. I actually gave up on my first choice stamp for the gray crock because I couldn't get a smudge-free look with it.
5. Don't press too hard or too long. It's very tricky getting a stamp to work on a curved surface such as a crock or jar but don't worry -- after a while you'll get the hang of it.
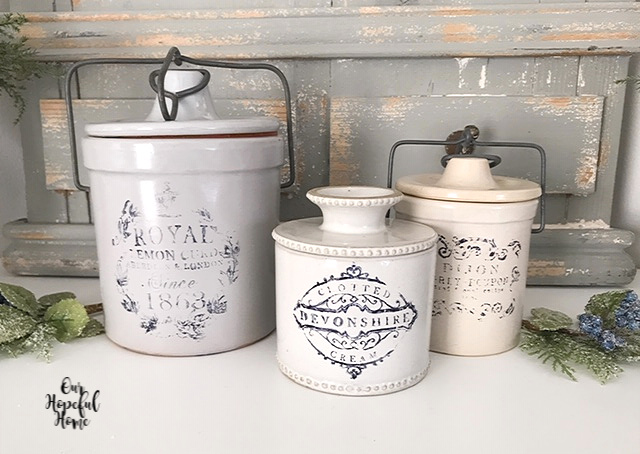
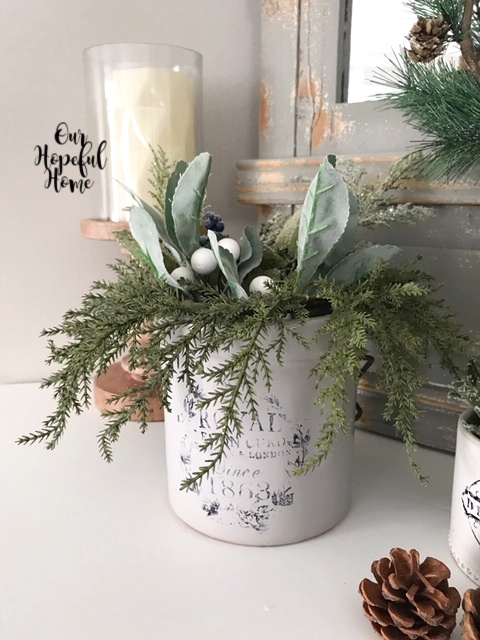
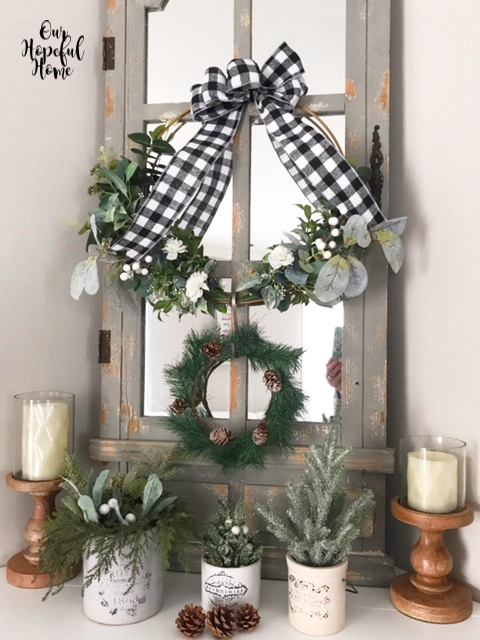
And here's my final product. You can see the print looks faded in many instances, but that's ok because I wanted it to look old and authentic.
I placed them on the mantel and filled them with winter greens for some texture and a rustic farmhouse touch.
And on my mantel they will stay, adding warmth, texture and a rustic farmhouse vibe to the room -- at least until I come up with some other ideas for how to use them in my decor!
DON'T FORGET TO PIN IT!
Be sure to stay in touch:
Click HERE to subscribe.
Don't miss another thrifty,
DIY home decor post!










Leave a Comment!
What cute crocks! Thanks for sharing how to do these!
These crocks are beautiful. They look so nice with the greenery inside. That store would be so much fun to go shopping at.
These are amazing - absolutely stunning. Great job, Pinned and thanks so much for sharing.
Those are super cool, I love how they turned out!
I love these! They are perfect for farmhouse decor. The store you mentioned sounds like a great place!
Wow! I am so in love with these beautiful crocks. Those stamps look really awesome too. I'll be on the look out for crocks!
I can't wait to try this. I love, love the look. So glad I found your blog recommended by Whitearrowshome. I joined your party this week but I'm ore excited to see your regular ideas.
These are absolutely beautiful!! I had no idea it'd been from a stamp. Love, love, love!!
Really great project! Did you put any sealer over the ink to keep it from smearing afterward? Did you put the stamp on a block and roll the block or just use the stamp?
Post a Comment