The term "butter pat" has two definitions. First, it's a small plate used to hold individual "pats" of butter for each guest at the dining table. Second, it's a small amount of butter, usually formed or molded into some sort of shape, that you place at each table setting on the "butter pat" plate. Got it?
Molded butter pats are so easy to make, yet they add an extra touch of "fancy" to any meal. I've experimented making my own molded butter pats and today I'm sharing my how-to with you. Ready to get started?
This post contains affiliate links. A purchase of any one of these items helps to support this blog and its creative efforts at no cost to you. To read more, please see my disclosure page.
Not that I need an excuse to start a new collection, but I recently started collecting butter pats. The small plate kind. I showed off my collection of vintage butter pats in Thrifted vs. Styled #152 and they got me thinking I should try making my own molded butter pats, or individual butter shapes. So here we go.
SUPPLIES FOR MAKING MOLDED BUTTER PATS
1. silicone mold (can be ice cube mold, candy mold, or any food-safe mold)
2. softened room temperature (not melted) butter (NOTE: many recipes call for unsalted butter, although I've not seen a good reason for that so I recommend using whatever butter you would normally use.)
3. utensils for filling the mold and smoothing down the butter (I used a mini spoon and butter knife, respectively)
4. OPTIONAL: silicone gloves to keep your hands clean
Yes, the supply list is short and sweet, just the way I like it!
HOW TO CREATE INDIVIDUAL MOLDED BUTTER PATS
1. Be sure your mold is clean and totally dry.
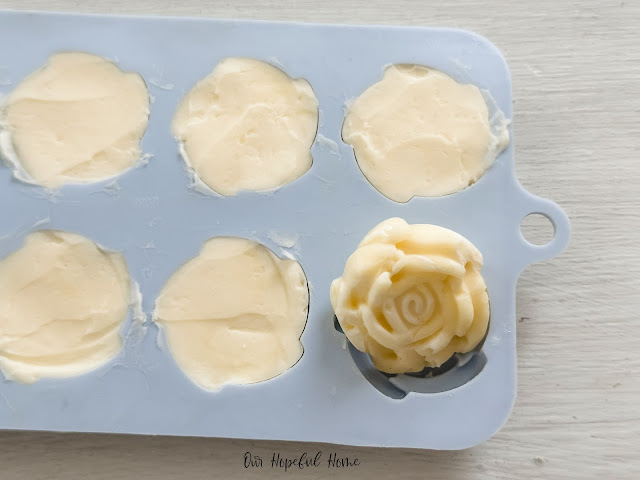
2. Using a small spoon (or whatever tool works for you), spoon the softened butter into the individual molds. I used a sterling silver baby spoon in major need of some polishing. No judgment, please.
3. Using a knife or icing spatula, gently smooth out the back side of the pat to make it as flat as possible.
4. Gently tap your mold onto the counter a few times to get out any air bubbles.
5. If you see the butter level go down just add more butter to even things out.
6. Place your mold into the freezer for at least a half hour. I waited over an hour because I didn't feel they were hardened enough at the half hour mark.
7. Once sufficiently hardened, gently pop the pats out of the mold and either place them directly onto butter pat plates or into a sealed container you can store in the refrigerator (just like any other butter) until ready to use.
NOTE: The more detailed your mold (like mine), the higher the odds that your pat might lose some of its shape while being popped out (or might not turn out completely perfect). You may want to start off with a simpler, less detailed mold, and later work your way up to a more complicated shape.
8. If using your individual butter pats straight from the freezer, be sure to remove the mold from the freezer in time to allow the pats to come to room temperature prior to the meal so they will be easily spreadable.
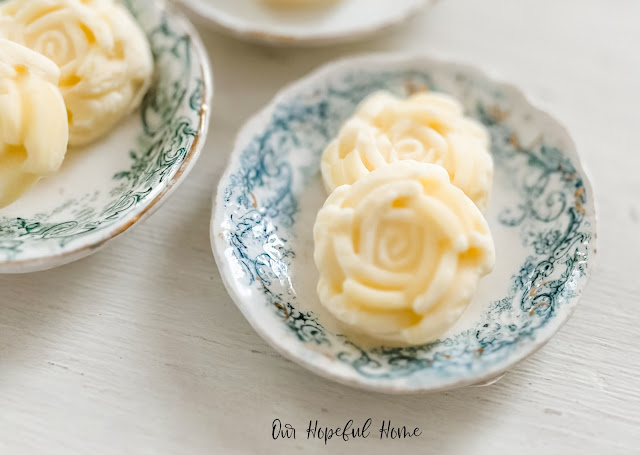
The mold I used was a floral silicone candy mold from Michael's. It has eight individual molds. Each one was a detailed, delicate flower very similar to a rose. I thought -- what better shape than flowers for my molded butter pats, when most of my vintage butter pat plates have some sort of floral or greenery imagery on them?
I stored my rose butter pats in a covered container in the refrigerator until I was ready to use them.
For purposes of this post I pulled them out of the fridge and set them out on my vintage butter pat plates -- love!
What a great way to elevate a meal and create a personalized experience for your family and guests. These individual molded flower butter pats can be used for any and all meals -- breakfast, lunch, brunch and dinner!
The really nice thing is that you can make your molded butter pats in advance and take them out of the refrigerator on the day of the event.
AND they can be any shape your heart desires -- as long as you can find a mold for it! Think heart shaped butter pats for Valentine's Day, Christmas tree butter pats for Christmas Eve dinner, shamrock butter pats for St. Patrick's Day, turkeys, pumpkins and acorns for Thanksgiving! I think you get the idea.
Mini Christmas Tree Silicone Mold
Turkeys Pumpkins and Acorns Silicone Mold
You can even make one big molded butter shape (like the traditional molded lamb butter) for your Easter table centerpiece. The choice is yours.
I'm so in love with my vintage butter pat plates and rose molded butter pats that I'm sure I'll be adding them both to many an upcoming get together. And since they're so easy to make, I can see me using them to level up every day meals as well.
I hope you've enjoyed reading about
How to Make Individual Butter Pats
Using Silicone Molds
and that I've inspired you in some way.
Don't Forget To Pin It!


.png)


Leave a Comment!
These are so pretty. What a great way to serve butter. Have a great week. Hugs. Kris
Post a Comment